Tackle body repair like an expert car detailer. In this guide we will provide you with detailed instructions, practical advice and tools necessary to restore the beauty of your car.
In detail you will find:
- Do it yourself car body repair
- How to repair bodywork dents
- Materials needed to repair the car
- How to putty the bodywork
- Sand
- Grouting
- How to choose putty to repair the bodywork
- How to repair small scratches on the bodywork
Do it yourself car body repair
Preserving the aesthetic appearance of your vehicle is a priority for many motorists and dents on the bodywork often represent an annoying inconvenience. When your vehicle shows the signs of aging with dents and imperfections on the bodywork, the first solution you think of is to rely on a specialized workshop for a complete repair. However, for lovers and enthusiasts of Car Detailing there is a more accessible alternative: DIY repair. In this article, we will explore the fascinating world of bodywork maintenance, focusing our attention on the use of fillers to deal with dents and small damages in an easy and professional way. You'll discover helpful tips that will guide you through the repair process, allowing you to maintain the aesthetic integrity and value of your vehicle over time.
How to repair bodywork dents
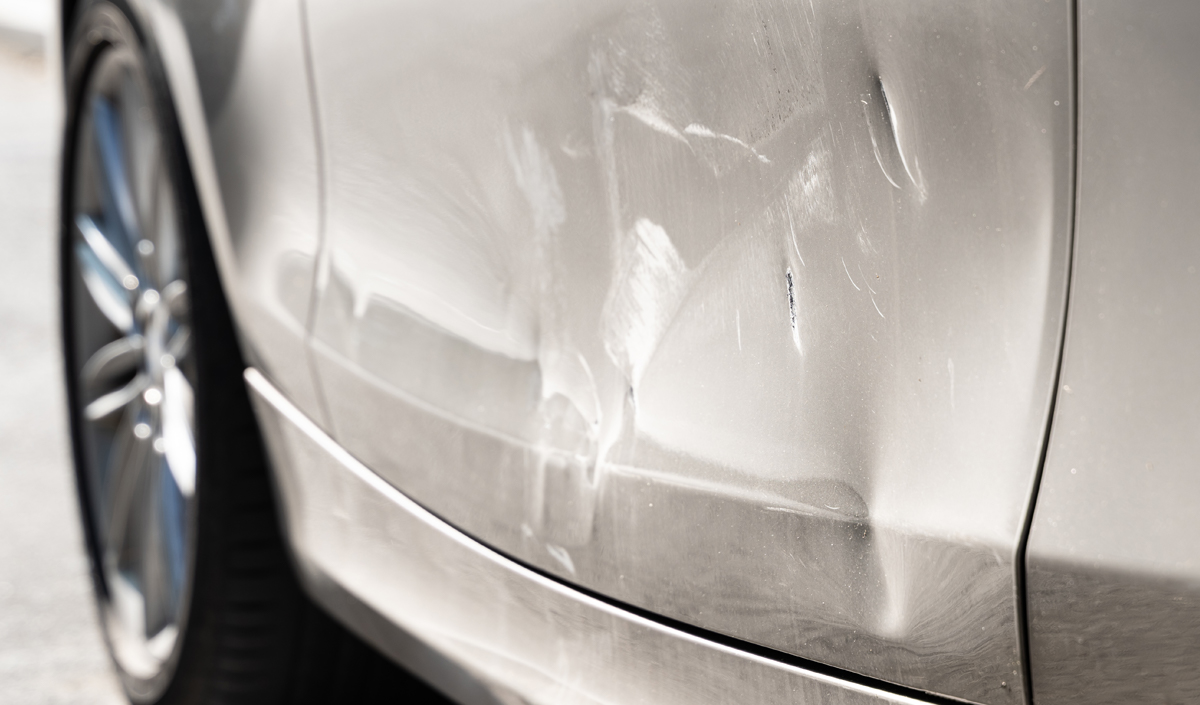
Dents represent a constant challenge for every detailer, as they are among the most obvious defects on the bodywork and are more complex to repair than superficial scratches. Each type of dent requires specific intervention and tools and before approaching a repair it is advisable to know the different situations that may arise.

Here are the main ones:
- Light Dents: they are recognized as small superficial deformities on the bodywork, often caused by light impacts with stones, small objects, (small) hail and small collisions. Light dents are the most difficult to spot (may require lots of lighting or looking at the surface from the side).
- Medium Dents: they present a more pronounced deformity in the sheet metal that is easily identifiable with the naked eye. The causes are often similar to those of light dents but with larger dimensions or with impacts at higher speeds. These dents may have creases or cracks in the sheet metal and require extra attention.
- Deep Dents: it is a significant deformity of the bodywork, often accompanied by significant structural damage. The cause could be due to an accident or similar collision. Deep dents are easy to spot, often with rough edges and noticeable creases. They may require a more in-depth assessment to detect any internal damage and the intervention of a specialized workshop.
To correctly identify the type of dent, it is advisable to also carry out a tactile assessment so as to perceive barely visible irregularities (in the case of light dents) or possibly use instruments designed to measure the depth of the damage. If you have a fairly powerful light, a useful strategy could be to position it at an angle to the affected area, so that deformities and dents can be visible. Understanding the extent of the dent better will allow us to save time, material and contain costs by avoiding useless attempts.
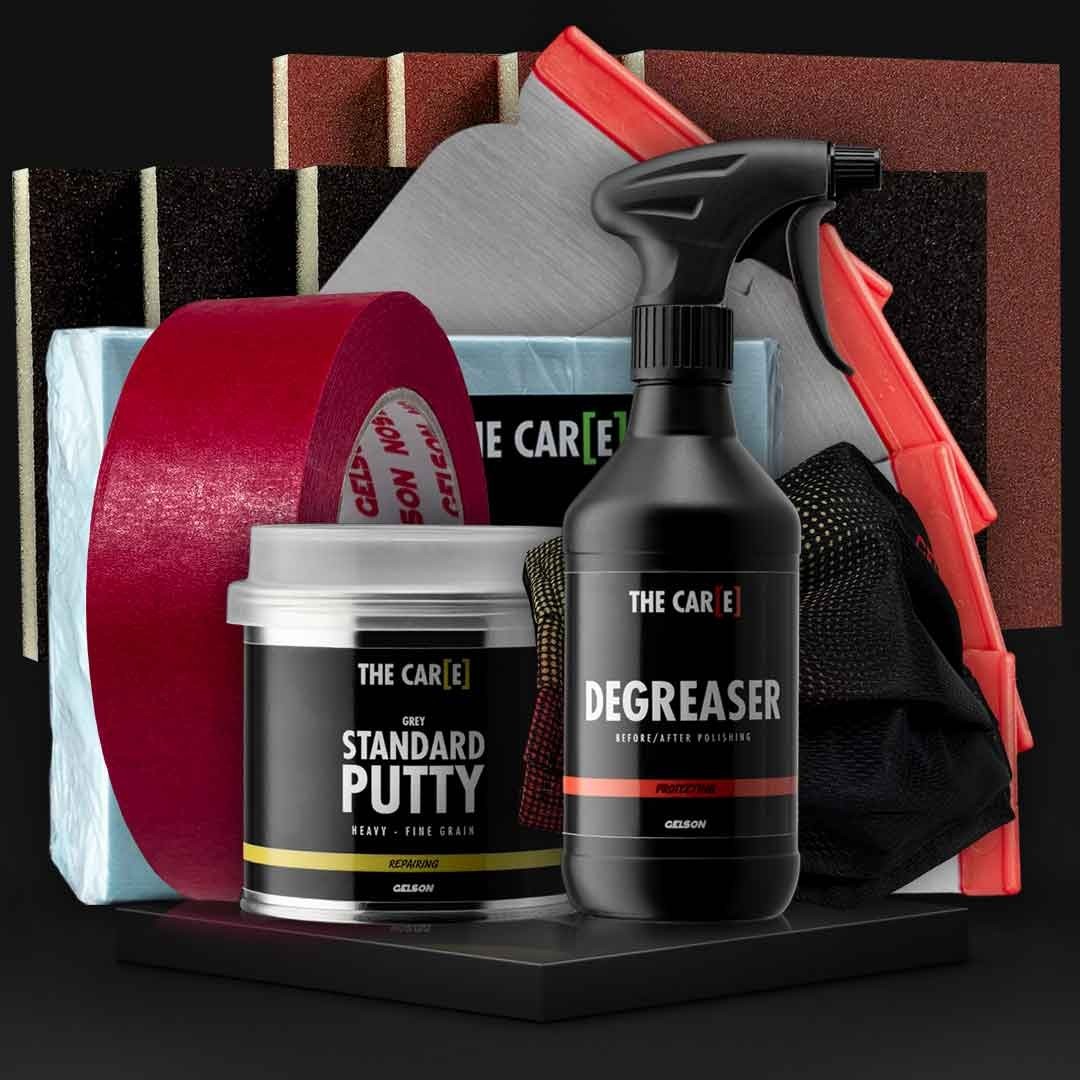
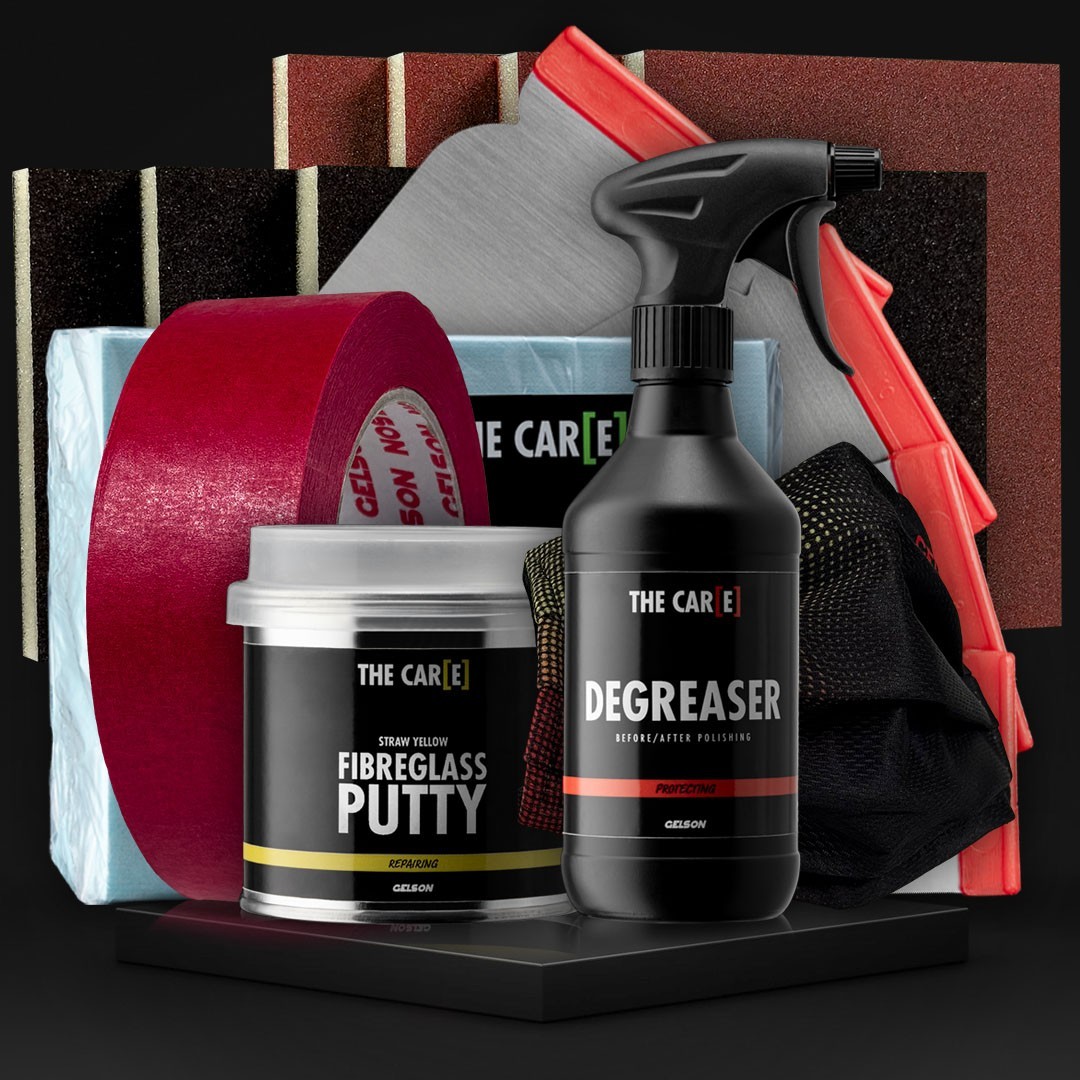
Materials needed to repair the car
After identifying the type of dent, it is essential to equip yourself with the right tools to carry out the repair in the best possible way.
Some items are essential, others are optional but can facilitate repair work in terms of time and performance. Below is the list of useful materials:
- Safety devices: disposable gloves, mask and protective glasses are strongly recommended for carrying out repairs on the bodywork, when dealing with chemical compounds and dust it is always good to protect yourself
- Sand paper: of grit 120, 220 and 320 (approximately) to be used with a manual pad or with machinery such as the rotary and random orbital machines
- Stucco: based on the type of repair we can evaluate the use of one stucco or another, as we will analyze better later
- Accessories: To spread the stucco, specific spatulas will be needed cleaning cloths of the surface e Degreaser to degrease any surface
- Optional: rotary or orbital polishers are used by the most expert detailers because they make work easier and faster, but we recommend first getting used to the manual pad
How to putty the bodywork
After identifying the areas to be treated and wearing PPE correctly, it is necessary to position yourself in a suitable place to carry out the repair.
As with all chemical components (especially stucco), work is done at a temperature of around 18/22 °C to prevent different temperatures from affecting the yield of the result and drying. Even a particularly hot surface (if we have turned off the engine after modest use and the bonnet to be repaired is hot) does not help in this process, especially for less experienced detailers.
Once the area to be treated has been identified (in the case of large areas to be treated, it may be necessary to intervene on the entire area and not only on the affected one), we must degrease the surface, so that there are no residues that will mix or dirty the paper abrasive.
Sand

The first operation to do is to degrease the surface so as not to leave residues which could compromise the sanding phase by kneading or dirtying the abrasive paper.
Subsequently we will move on to the actual sanding with the coarser paper, until the paint is removed. Once you reach the background (usually gray or white in colour) you can proceed with the medium grain paper, replacing it again with the finest one when we get closer to the bodywork without paint or primer.
The movements we can carry out are circular, but they can also be transversal. The advice is not to apply force until we understand how much material is removed after each pass, so as to learn and not make mistakes. It is better to spend a few more minutes in this phase, especially if you are an inexperienced detailer, in order to understand the movements and the ideal pressure to apply.
Grouting
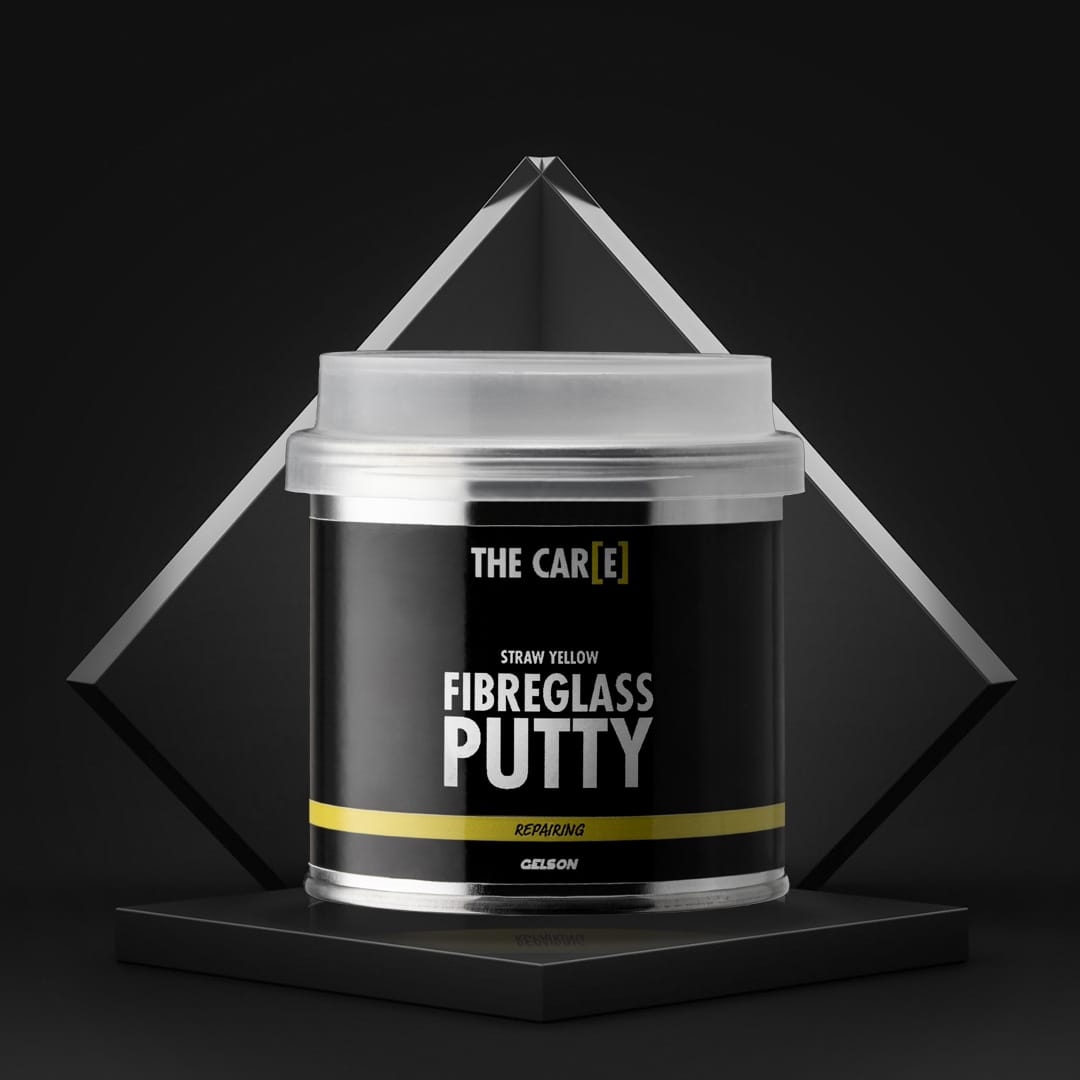
Once you get to the body shop (in this case we are talking about the metal ones, we recommend the Fiberglass Putty to repair fiberglass or similar bodywork), it will be possible to proceed with the application of the stucco.
Stucco can be of various types, but is mainly divided into 2 types: single-component or two-component. The former are simpler to use as they are ready to use, but unlike the two-component ones they have lower resistance. Two-component putties are the ideal solution for a solid and long-lasting repair, which is why The Care putties are all two-component.

- Prepare the two-component putty: Depending on the type of product, a different dosage may be necessary; in the case of The Care putty, the dosage is between 2% and 2.5% and it is possible to obtain the correct dosage using precision scales. The more experienced detailers usually proceed by eye, but to do this generally requires experience, including the total dosage of the product.
- Add the catalyst: You can now take the quantity of grout by portioning out the appropriate quantity of catalyst. It will now be possible to join the 2 parts with a movement called spatulating, where the 2 components are mixed together by passing them from one spatula to the other with the aim of visibly uniforming the 2 components. This process must be done in the right way, but certainly in the right time, otherwise the catalyst will activate the stucco making it harden.
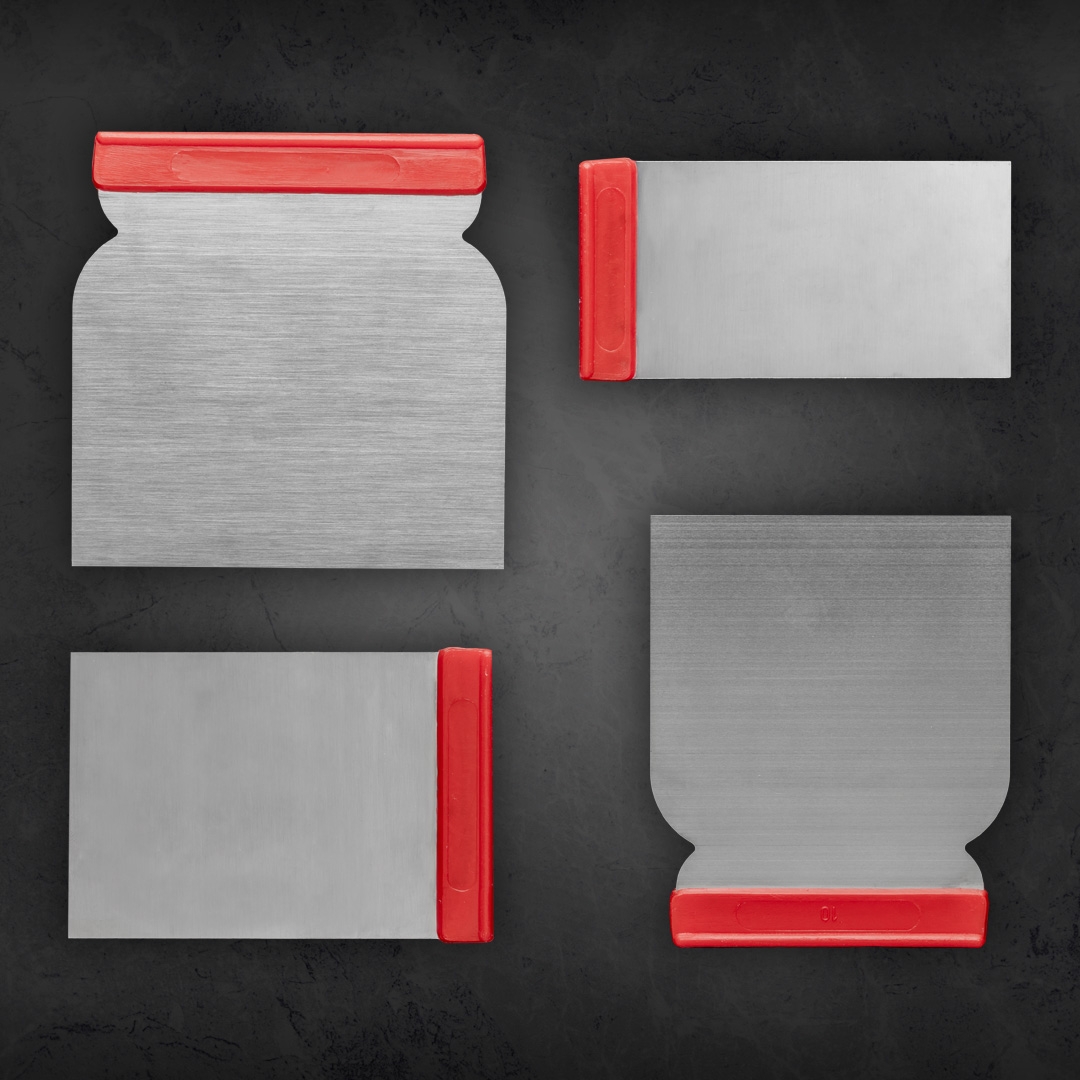
- Prepare the spatulas: Spatulas are required to portion, mix and spread the product. You can proceed using the ideal format of Putty Knife, i.e. the one that allows the treated area to be treated correctly in its entirety or that allows for a better spatula stroke. You may need a larger spatula if you are carrying out repairs on curved parts, as it is possible to flex the spatula if it is of suitable size, the smaller ones are more rigid but excellent for small fillings on flat parts.
- Spread the product: Once the stucco has been adequately mixed and a homogeneous color without streaks or stains has been obtained (thanks to the glove we can place a finger on the stucco to check that the temperature is higher than the ambient temperature, this means that the chemical reaction is taking place), we are ready to spread the grout with the spatula, taking the right amount and exerting the right pressure. The result to be obtained is the homogeneous application of the stucco, without it forming ripples on the surface, a sign of incorrect application.
- Leave to dry: Once we have managed to obtain the desired result and filled the dent, it is time to dry. We recommend leaving the stucco to dry for a few hours, the exact times depend on humidity and external temperature. The Care fillers can be dried with air, lamps and heaters (depending on the filler with a limit of 90/120°C).
- Sand: Once the putty has dried (by touching it we can feel whether it is dry), it will have a hard consistency, we are ready to use the abrasive papers again, in the same way and grit as before, being careful this time not to reach the metal part of the bodywork anymore, but to stop at the paint level, trying to respect any.
How to choose putty to repair the bodywork
How to choose putty to repair the bodywork
- Standard Putty white: It has a fine grain and excellent spreadability, which is why it is suitable for light dents. Excellent as a finishing putty (to be used over other putty), and is easy to sand.
- Standard Putty grey: similar to the previous putty, but with a coarser grain, suitable for light or medium dents. It can be used as a filling putty.
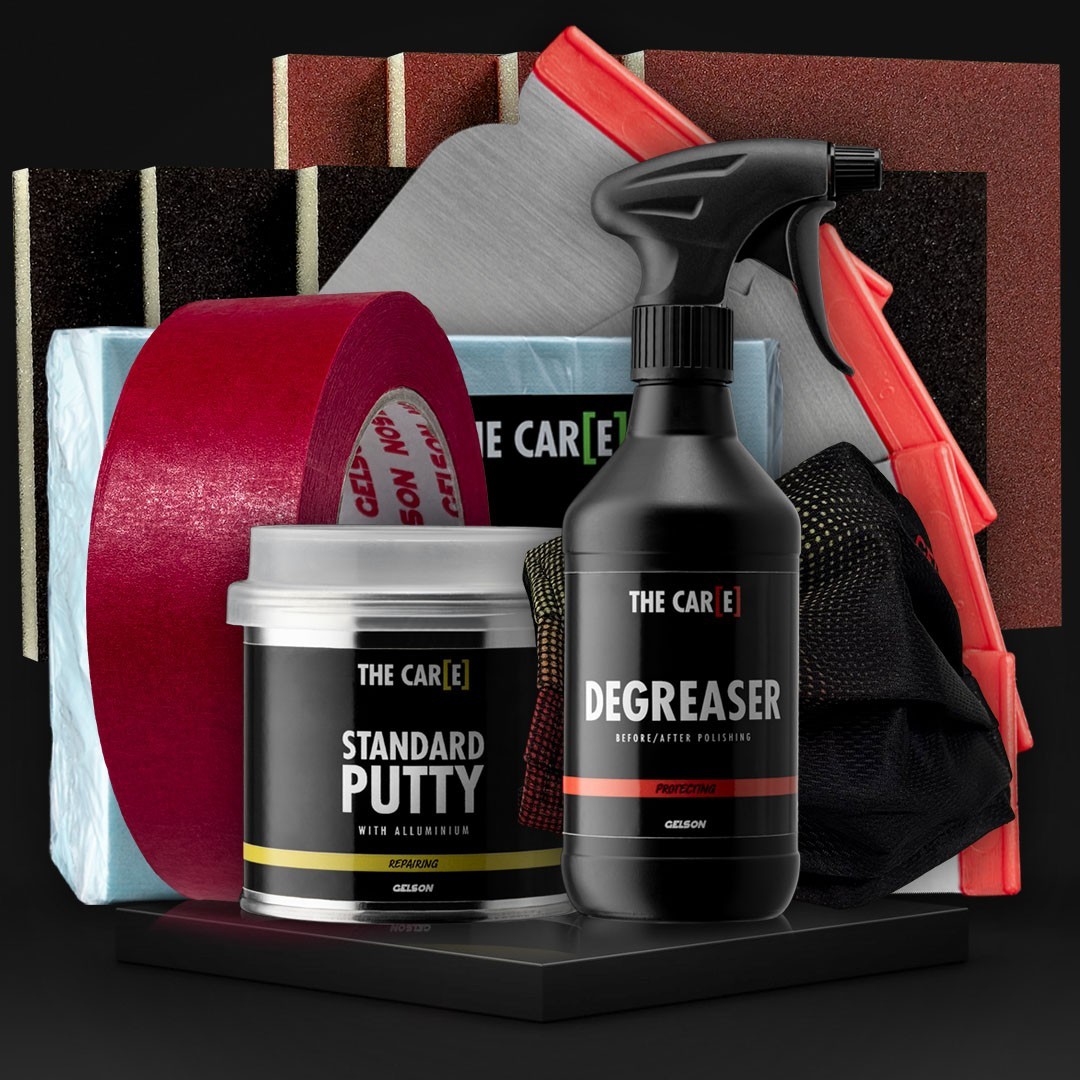
- Standard Putty with Aluminium: putty with aluminum parts, compared to the first 2, has a more pasty consistency, suitable for deep dents. It can be used as a filling putty.
- Fiberglass Putty: ideal filler for fiberglass and gelcoat. Suitable for deep dents and can also be used on metal bodywork, suitable for deep dents. It can be used as a filling putty.
How to repair small scratches on the bodywork

When you are faced with small scratches on the car body it is important to tackle the problem with the right repair strategy. The use of stucco is not recommended for this superficial damage. Instead, we recommend using a dedicated scratch remover, designed to treat and minimize visible marks on the paint surface. This product is specifically formulated to act specifically on surface scratches, helping to restore the original appearance of the bodywork.
For further details on how to correctly use the scratch remover and carry out an effective repair, we invite you to consult the complete guide on how to remove scratches from bodywork.
How much does it cost to repair the bodywork
Tackling auto body repair can involve several options, each with varying costs that influence the vehicle owner's decision. The traditional approach, relying on a professional body shop, often involves a significant cost that includes labor, materials and service fees. Average prices can vary considerably based on the extent of the damage and the specific geographical region (from 200/300 euros for lighter damages up to much higher figures for medium damages).
On the other hand, the do-it-yourself option presents itself as a cheaper alternative, where the cost is mainly determined by the purchase of materials and tools necessary for the repair. Although prices vary depending on the complexity of the job and the quality of the materials chosen, do-it-yourself offers the opportunity to save significantly compared to professional advice.